Tuesday, May 28, 2013

May Sketch of the Month

I know that I'm running a little behind with my sketch, but it's still May isn't it :)  

I hope that all of my American friends and followers had a safe and happy Memorial Day weekend.  We had a fun filled, albeit wet, family weekend in France and Belgium visiting WWI memorial sites.  It is often hard being so far away from friends and family here in Europe, but we are so fortunate to be able to visit many incredible cities and sites.

My May sketch was inspired by my sweet little daughter, the watermelon jelly that I just finished canning, and memories of eating the first watermelons of the year during our neighborhood's Memorial Day BBQ.

watermelongirlweb


I have really been enjoying my exploration into this more illustrative drawing style.  I've found it very freeing and it has really helped me develop my ability to draw without a model or reference.  I'm also getting more confident with my Bamboo tablet.  This drawing was sketched by hand in pencil, and then scanned and colored on the computer with PSE.  

Now I need to sew something with a watermelon theme just to round this month out :)  Maybe a coffee cup sleeve?  Any ideas on a quick useful watermelon themed sewing project?

Sunday, May 26, 2013

Watermelon Jelly recipe and labels


Lately, the weather here has just been rubbish.  Two weeks ago we had sunshine and it started warming up.  The flowers bloomed, and I got to can some fabulous Dandelion Jelly.  This week we've had to put back on the winter coats.  But, this has not deterred me from continuing my spring canning!  This week I made some incredible watermelon jelly that was to die for and designed some super cute labels for my jelly that you can download and use as well.

watermelonlblblankweb

Watermelon is one of those unsung jelly heroes.  It's sweet and fresh and wonderful on toast, biscuits, and sandwiches.  It's also the perfect way to preserve an over-abundant watermelon crop that might otherwise go uneaten.

IMG_5155


I've been perfecting my watermelon jelly over the last two years and have finally come up with a recipe that is by far my favorite.  Some recipes for watermelon jelly describe it as tasting like jolly rancher candies.  Personally, I don't want my jelly to taste like fake over-sugared watermelon.  To me, watermelon jelly should taste fresh and sweet.  It's one of those jellies that has to be balanced just right so the flavor of the fruit is not overpowered by the sugar.

Ingredients:
6 Cups of watermelon juice
5 cups of sugar
1/4 cup bottled or fresh lemon juice
3 Tablespoons of "Apple Cider Vinegar" 
2 bags liquid pectin (you can use powdered, but be careful it tends to clump in this jelly if you just dump it in)

IMG_5147
  • First, find a nice, ripe, wonderful watermelon.  
  • Cut your watermelon into cubes and mash the cubes up into a juicy pulp.  You can use a food processor, a blender, a hand blender, or a potato masher to accomplish this.  
  • Then you need to strain your juice to get rid of all the seeds and pulp.  I personally use a mesh jelly bag, but you could use cheese cloth, or a strainer.  If you cant get all the pulp out, don't stress.  There is actually not that much pulp in a watermelon, but do try to remove as many seeds as you can so people don't have to pick them out of the jelly later.  

IMG_5145
  • Put a stack of saucers in your freezer before you begin cooking so that you can test the set of your jelly later.
  • Add your watermelon juice, sugar, lemon juice, and apple cider vinegar to your pot and bring it to a full rolling boil that you can't stir down (about 10 minutes).  *Note:  I use apple cider vinegar to enhance the wonderful fresh flavor of the watermelon in this recipe and to add some acidity for preservation.  You could use only lemon juice or use other vinegar, but it's just not going to give you that balanced taste that I've been gushing about.  I personally use Bragg's apple cider vinegar because it is my favorite brand. 
  • Add your pectin and continue cooking for 1 minute (this may vary based on the type of pectin you are using.  Check the recommended cooking times on you pectin box for best results)
  • Check the set of your jelly on a cold saucer to make sure it's set the way you want.
  • If it's too runny, continue cooking it for a few more minutes and check the set again.
  • If it's still too runny you may need to add some more pectin.
  • Ladle your hot jelly into prepared jars leaving a 1/4 inch head space and process in a water bath for 10 minutes (more or less according to your altitude).
IMG_5168

See how beautiful and bright this jelly is!  I'd love to try it with a yellow watermelon too if I can find one this summer just to see how the color turns out.  The only thing missing is a pretty and informative label.

IMG_5224

Luckily, I designed a really cute label that you can download and print out for your jars as well.  I used a full sheet of printable label paper and cut out each watermelon individually.  I'm sure you could also use regular paper and glue or paste them on as well.  Don't forget to write the date on your label using the blank space on the left :)

If you decide to make this jelly or use my labels, I'd love to hear from you and know how it turned out.  Happy canning!

Saturday, May 18, 2013

Dandelion Flower Jelly

Last week we finally got a taste of spring here in Germany.  The flowers bloomed, the birds sang, the squirrel discovered our bird feeder; yes, all was right with the world.  Alas, it did not last and we are back to sweater weather here.  But, while the weather was nice I decided to get out Big Blue here and do some early canning.

DSCN2401

Big Blue, is my huge vintage immersion canner that I picked up very reasonably last season.  I love being able to put food by for the winter months.  There is something very satisfying about opening a jar of cherry pie filling at Christmas and having the cherries actually taste like cherries and not red colored flavorless canned glop.

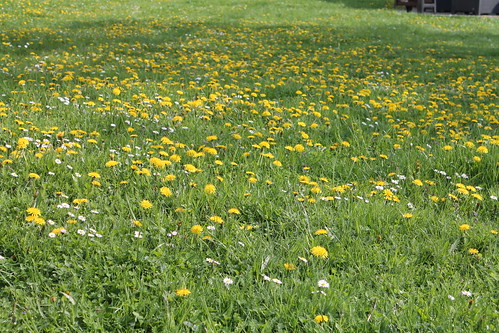
I didn't have to go far to find our first fresh produce of the season.  In fact, I just had to look outside my door to see the wonderful harvest awaiting all those little helper hands.

IMG_4800

If the post title didn't give it away, my first jelly of the year is dandelion jelly.  

IMG_5114

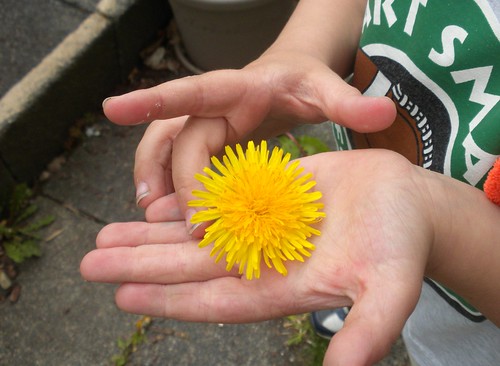
I love dandelions!  I love seeing a yard full of these beauties rather than a nice manicured lawn.  

DSCN3710

So, the kids and I started the season by gathering buckets of dandelion flowers in order to make tea and jelly.  The best way to gather flowers is when they are in full bloom around the noon hours.  Trust me, they just taste better this way.  

IMG_4804

For those of you who are concerned about eating Dandelions, don't be.  They are completely edible from root to flower.  I personally love dandelion greens, dandelion root tea, and dandelion flower tea (although the root and flower taste different and have different uses).  Just make sure that you harvest your flowers, roots, and leaves from a site where they have not sprayed with herbicides or pesticides, and also avoid harvesting near the side of a road.

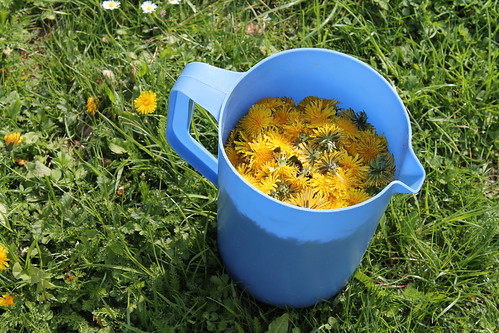
To make dandelion jelly you first need to gather at least half a pitcher of dandelion flowers (about 4 cups).
  
IMG_4806

I've got a lot more than four cups in my colander because I made a double batch, but four cups is enough for a single batch.  If you have a little more or a little less, it is fine.  More flowers just means that you are making a stronger "tea" base for your jelly.  Now you need to clean and de-stem your flowers for the tea. 

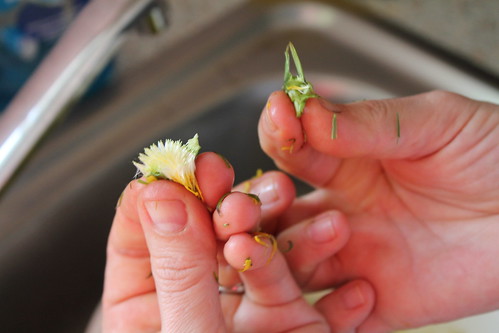
There seems to be some debate in the dandelion jelly world about if you should leave the green base on your flower or not.  Really, it's just a matter of taste.  Leave it on for a jelly with a bit of good bitterness to it or take it off for a lighter flavor.  I like it both ways, and so I make both versions.  Dandelion Jelly tastes a lot like honey.  It is very sweet and the kids just love it.  

To clean your flowers you need to rinse them well in luke warm water.  Not hot, not cold, but room temperature.  This is so the flowers do not completely close while you're rinsing them.  It's much harder to de-stem closed dandelion flowers.

IMG_4807

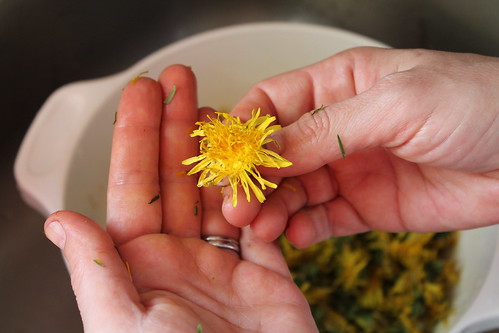
I've seen instructions for de-steming dandelion flowers that involves scissors, knives, and even tweezers to get every bit for green off, but honestly the easiest way to do it is just with your own two hands.

Gently pinch the petals in one hand and grip the green base in the other.

IMG_4808

Pinch the green base and pull the two sides apart.

IMG_4810

Seriously, it's that easy. You might have to give it a little twist and adjust where you hold the base, but after about 4 flowers you'll find a rhythm.

IMG_4812

Don't worry if you don't remove every speck of greenery from the petals.  It will not ruin your jelly or drastically change the flavor.

IMG_4813

To make the tea pour 6.5 cups of boiling water over your prepared flowers (or your whole flower heads if you chose not to separate the petals).  Cover your pot, bowl, or other container (not plastic), with a lid and let it steep for a few hours or even overnight.

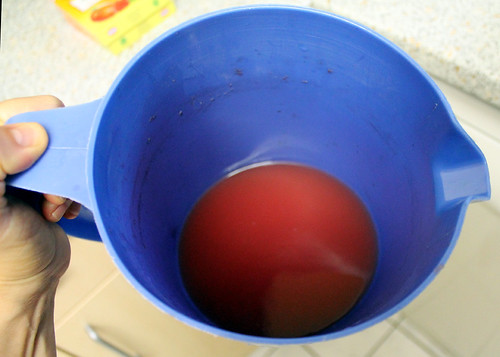
Strain the tea using a jelly bag or a strainer so that you remove the petals.  You'll need 6 cups of tea.  If you don't have enough, just add water until you do.

Dandelion Jelly recipe:

6 cups dandelion tea
5 cups white sugar
2 pkgs of pectin
The juice of 1 medium lemon (or 3T pkged lemon juice)
*1/2 of a finely grated lemon rind or orange rind
*optional

Cooking:
At this point I'm assuming that you've canned before.  If not, please look up more detailed instructions on sterilizing your jars and lids and just a good overview of the ins and outs of immersion canning.  Put a few saucers in the freezer now so they will be cold enough to test the set of your jelly later.

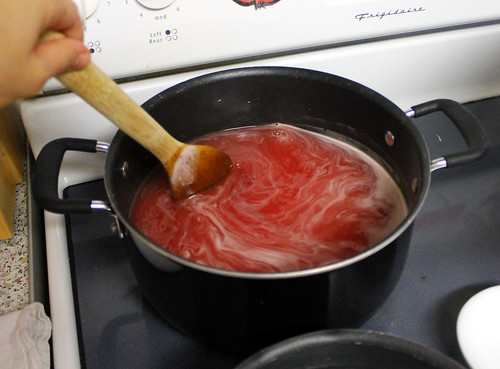
In large pot add dandelion tea, sugar, and lemon juice and *grated rinds.  Heat until it comes to a full boil that can't be stirred down (around 8-10 minutes).  At this point add your pectin.  Because all brands of pectin are a bit different, how much you need is going to depend on your type.  I use 2 packs of gelfix 2:1, which is a European brand that I have not seen in the states.  I think a good US equivalent would be a less sugar pectin like sure-jell's.  Add pectin and stir for 4 minutes (for best results, check your pectin's recommended cooking time and adjust accordingly).  Test the set of your jelly with a frozen plate.  If it's not set enough, cook the jelly a bit longer and retest.  If it's still not setting, you may need to add a bit more pectin to the batch.  

Once the jelly is ready, pour it into your jars leaving a 1/4 inch head space and process them for ten minutes (higher and lower altitudes will need to check the recommended processing times on their pectin packages).

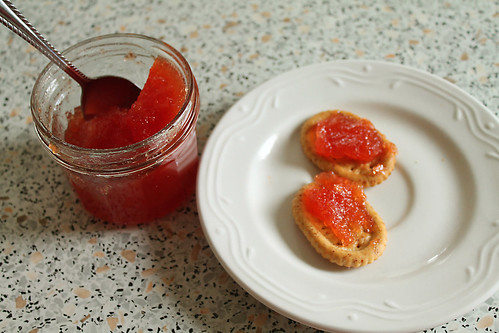
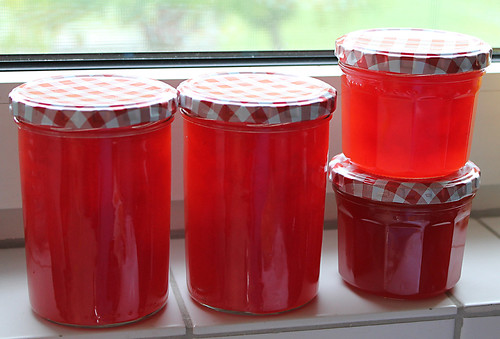
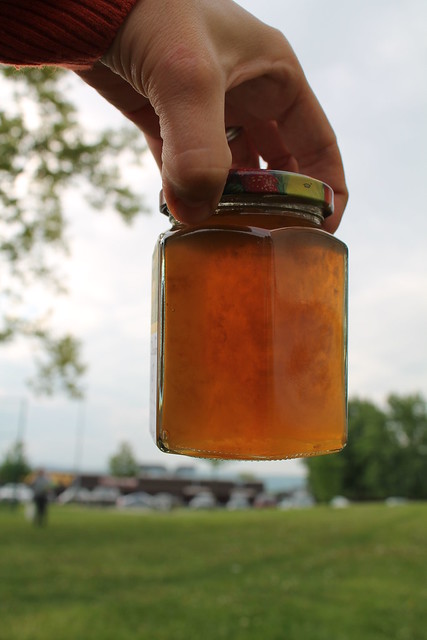
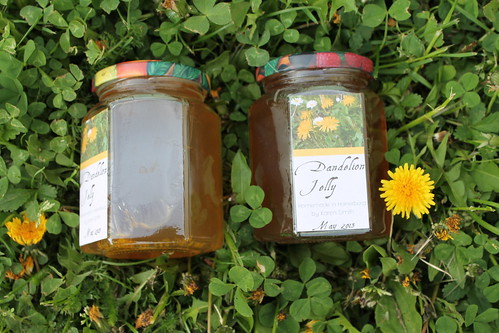
Let your jars cool down and check to make sure that they all sealed.  Your jelly should be the color of honey.  Make sure that you leave out a jar for the family to sample and hide the rest otherwise you'll find empty jars and crumbs in odd places around the house :)

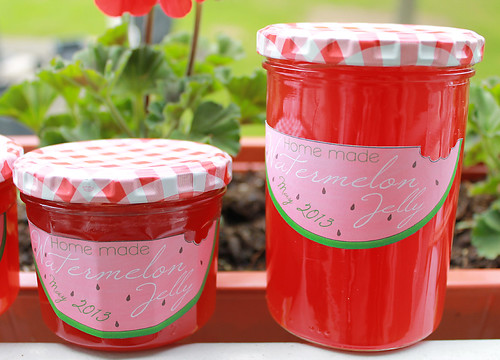
Don't forget to add a nice label to your jars listing all the vital jelly information that you'll want to remember.  I've been having a lot of fun designing my own labels this year.  
        
IMG_5117

I hope that you found this post helpful, and I would love to hear if you decided to make some dandelion jelly using my recipe.  

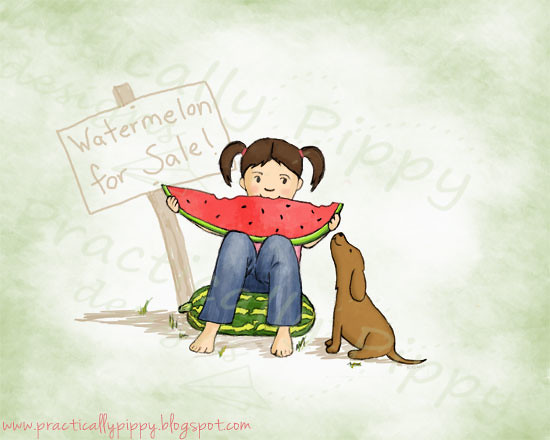
Next it's watermelon jelly!

What jams and jellies are you planning to make this season.

Saturday, May 11, 2013

Apron Exchange

This month I've been busy on lots of projects, but one of the most pleasurable has been researching, planning, and sharing ideas for the crafty cooks apron exchange that I've been participating in.  I've been stalking my secret partner and have come up with an Asian inspired apron for her.

IMG_4765

I really hope that she likes it.  It has a nice wide waistband and ties around the front.  Do you recognize the fabric on the pocket side :) ?  This was one of my recent purchases from the Im Patchworkhimmel shop that I found here in Germany.  You can read more about my German Fabric trip here

The three pockets should hold anything that my partner wants to stow away while she's cooking or working.


IMG_4766


My partner is also a quilter and loves the little details, so I appliqued a cherry blossom branch on the corduroy side of the apron and added a border that reminds me of one I'd use on a quilt.  Plus, who doesn't like binding?

Now, because I've been stalking my partner, I've gotten to read a bit about her two beautiful children, and I couldn't let her little helpers go without their own aprons too.

IMG_5123

Her little lady is a bit older than my model, but I hope that she feels special in her apron that is made to coordinate with her Mommy's.

IMG_5133

I got to go a bit more girly with this apron by adding a frilly edge to the umbrella fabric that matches the main fabric on the Mommy apron.  As you can see from above, it also ties in the front so that her little girl can tie and untie it more easily by herself.

IMG_5099

She also has a little man that I just couldn't leave out either.  So he got a manly cars apron.  I didn't think that  he'd want to match the ladies ;)  

I also created another little extra that I'll be posting (with a pattern) soon for everyone to enjoy.  For now, I hope that you like my aprons, and feel free to visit my apron pinterest board for more apron inspiration.  

Related Posts Plugin for WordPress, Blogger...